Creating a Server
Create a server when you are ready to host a game session. The wizard lets you review the configuration and hourly rate before you commit.
Before you begin
- Sign in to the account that will own and pay for the server.
- Choose a supported game from Games. Coming-soon games cannot be created.
- Have enough credits for at least the displayed first-hour price, plus the time you plan to run.
- Check the game guide for client requirements, world settings, passwords, and any mod credentials you will need.
Choose the basics
- Open your game's creation wizard at Game Information, then select Next to reach Server Configuration.
- Enter Server Name and, where appropriate for the game, Password. A password field does not mean every game uses the same private-server joining method.
- Choose Region, then Server tier and Server size. Check the resources and hourly rate for the selected combination.
- Select Next to open Game Settings.
Available choices vary by game and region. See Choosing a Region and Choosing a Server Tier and Server Size.
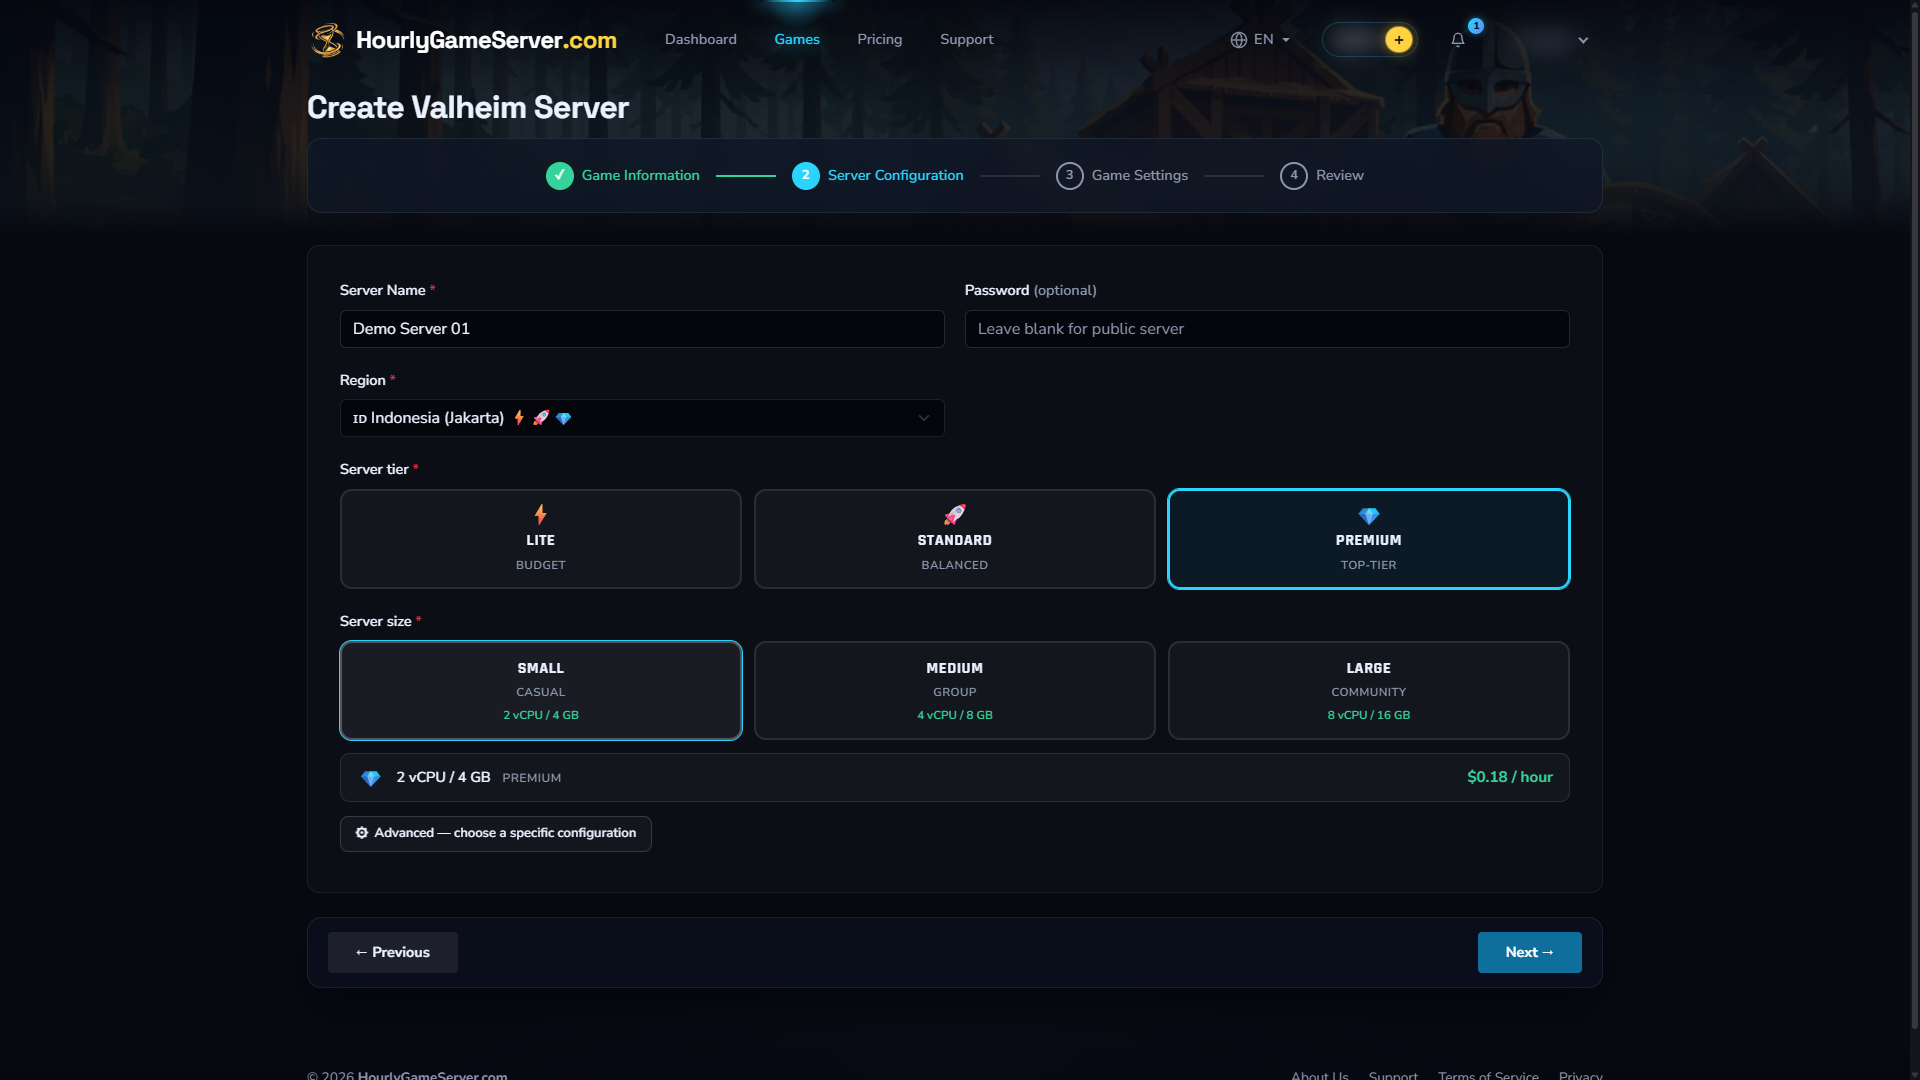
Unsubmitted Valheim example: Server Configuration. The region, tier, and size shown are not recommendations for every workload, and displayed prices are illustrative, not a promise of future rates. The password is empty; this example is not ready to create. Check your game's password requirements before submitting. No server was created.
Configure the game
Open the relevant settings groups and set the options for your session. Start with a small number of changes so you can identify a problem later. Some world-generation settings only affect a new world, not an existing save.
Only games with integrated mod support offer a mod picker. Review compatibility and any required download credentials before selecting mods. Select Next to open Review.
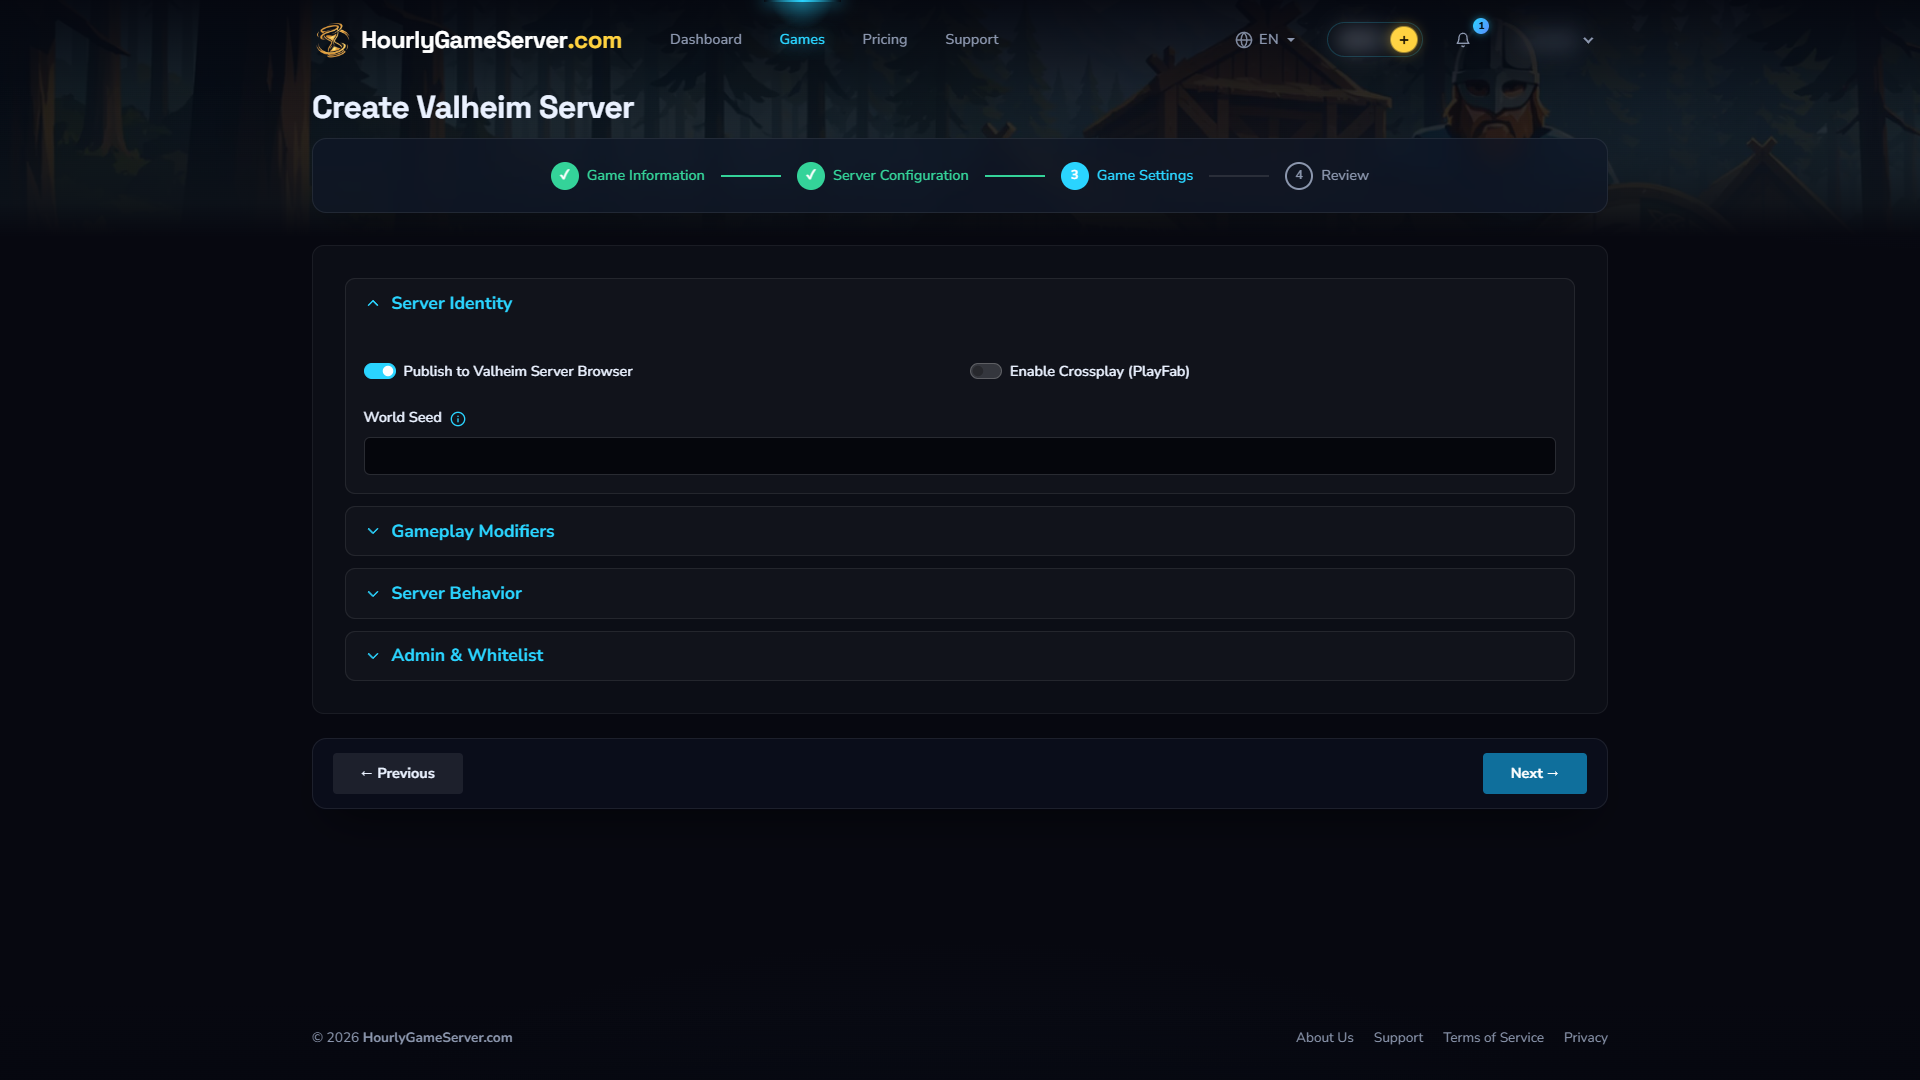
Game Settings in the same unsubmitted Valheim example. Other games offer different settings; use your game's guide rather than copying these choices.
Review and create
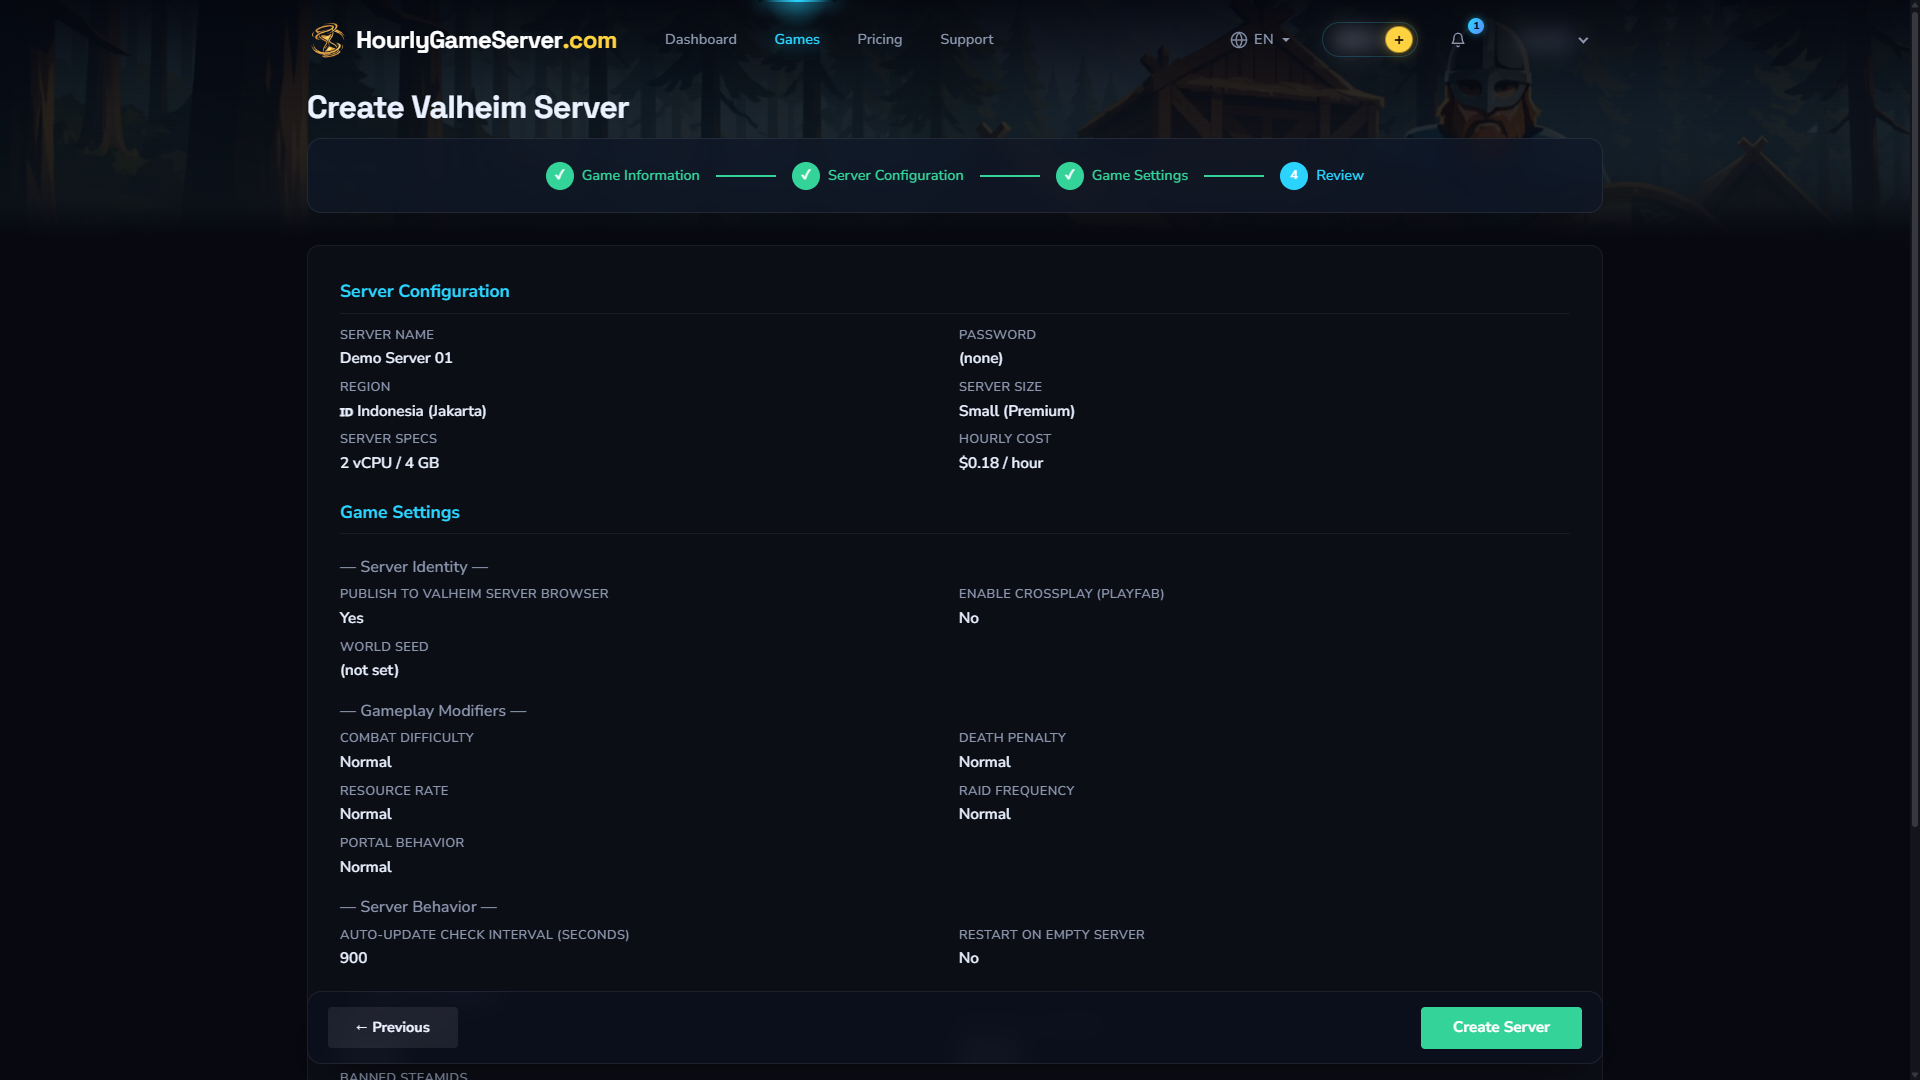
Review in the unsubmitted Valheim example. The empty password still needs attention under the game's requirements; reaching Review does not mean a configuration is ready to create. Check your own selections and current price before submitting.
- Check the server name, game settings, region, tier, size, and hourly rate in your wallet currency.
- Use Previous to correct anything, then return to the review.
- Select Create Server once. Creation charges one full hour upfront.
- Follow the server's status in Console. A funded server enters Starting, then Running when startup completes. Follow Connecting.
If credits are insufficient, the server remains Stopped and hosting does not start. Add credits to the owner's wallet, then select Start on that server; do not create a replacement.
If the page stalls after submission, check Console before submitting again. Another submission can create a separate server with a separate first-hour charge. For an Error or a startup that does not complete, follow My Server Won't Start.