Terraria
Before you begin
Use this guide to create a Terraria world, set its rules, and invite friends. You need a compatible PC Terraria client with the same game version as the server. This service uses TShock, not tModLoader; a tModLoader mod pack is not a compatible replacement for the standard client. Do not assume a console edition can join this PC server because Terraria is also sold on consoles.
Have a character ready. A Journey world requires a Journey character; other world difficulties use non-Journey characters. The official Terraria wiki describes dedicated-server play and version requirements.
Sign in to hourlygameserver.com and have enough credits for the first hour. To edit a shared server, your role must allow game-settings changes; moderation needs player-management permission.
Choose a region and server size
Select a hosting region near the players, then compare the available Server tier, Server size, and hourly price. Small is a reasonable starting point for a new world and a small group. Consider Medium or Large when more people play or a developed world puts pressure on resources.
Server size and World Size are different: the former chooses hosting resources, while the latter determines the dimensions of a newly generated Terraria world. Selecting a larger server does not enlarge your map.
Check CPU and Memory in the Console once your group is playing. See choosing a region and choosing a tier and size.
Create the server
- Select Terraria from the games catalog and open its creation form.
- Set a recognizable server name and an optional joining password. Use a password for a private group.
- Choose the region, tier, and size, then select Next.
- In World & Steam, choose World Size and World Difficulty before the first start.
- Expand the other settings sections to review PvP, spawn protection, and autosave.
- Continue to Review, check your choices and hourly rate, then select Create Server once.
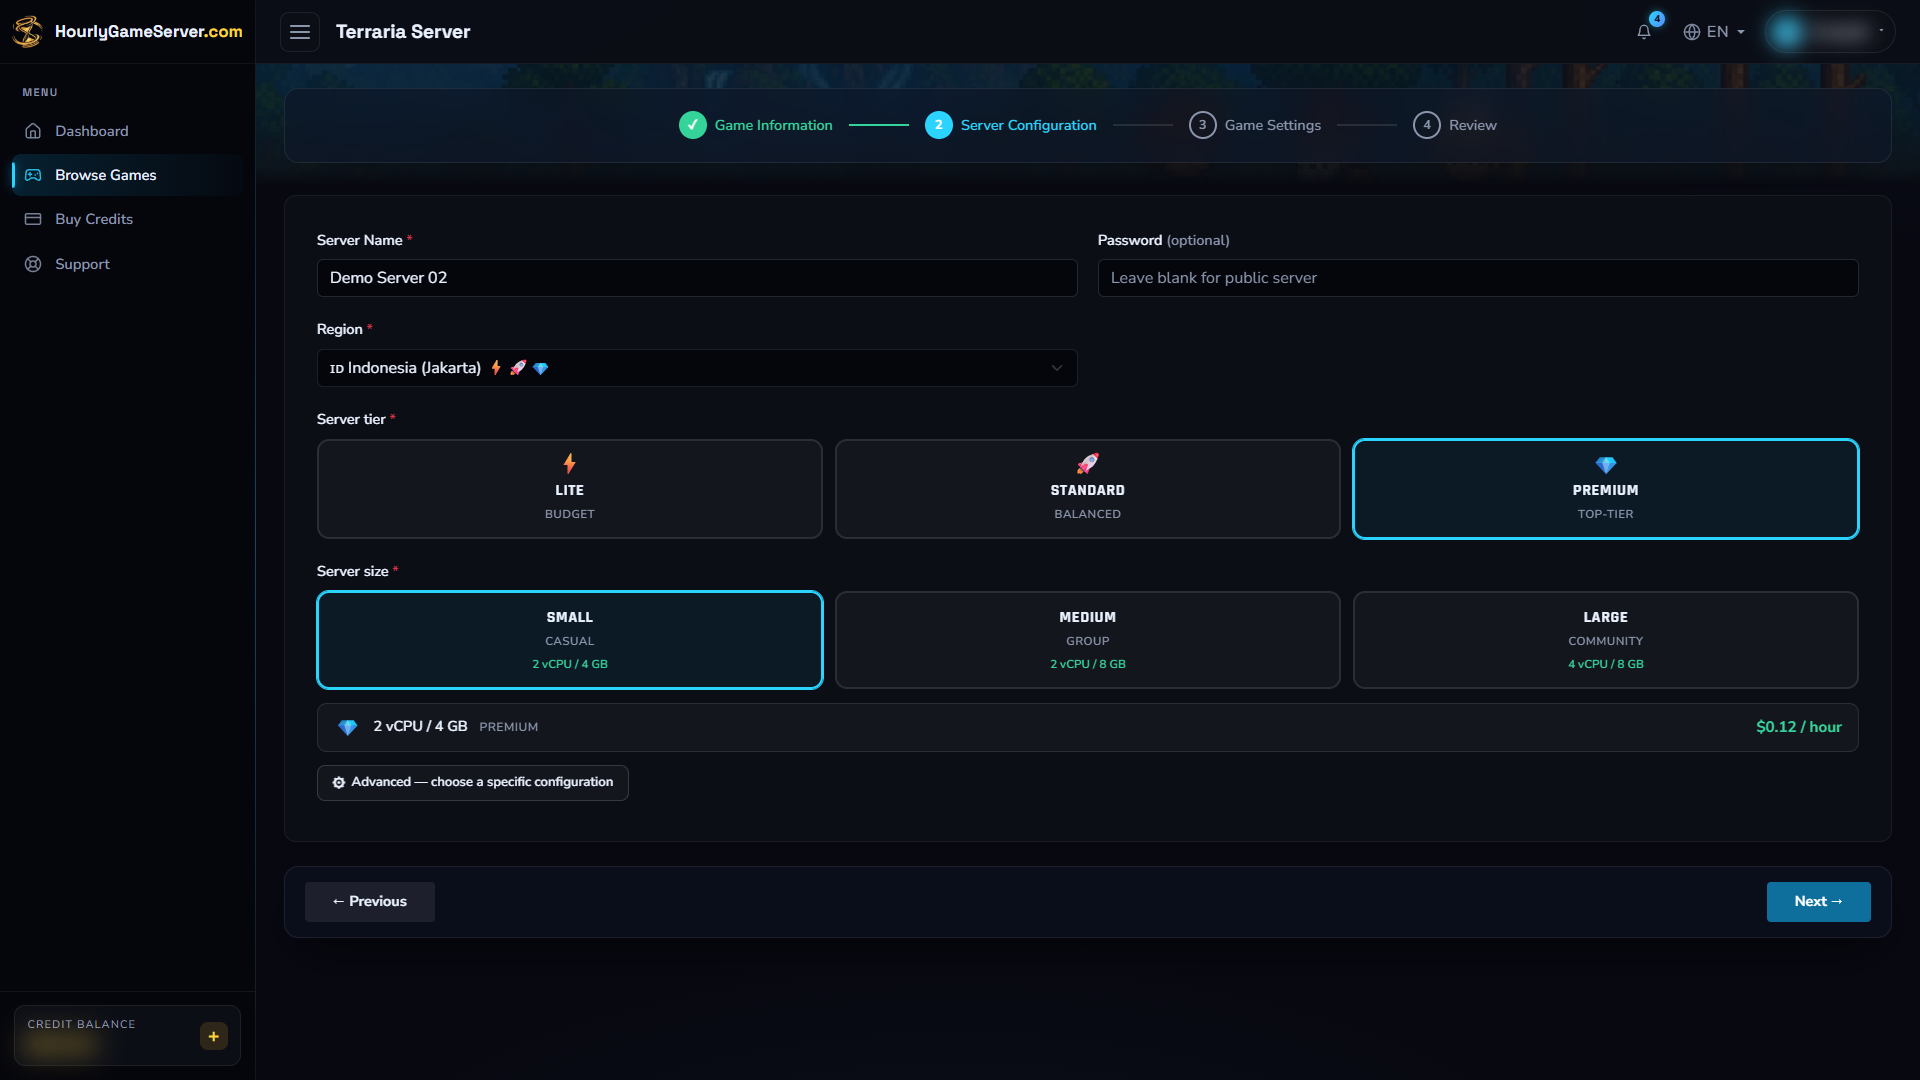
Choose hosting resources and a location for your group. The region, tier, and size shown here demonstrate the form; they are not required choices.
Creation charges a full first hour when your balance is sufficient. Otherwise the server stays Stopped; top up and select Start when ready. Open the server in the Console and follow Overview until Running. Initial world generation can take longer than loading an established world.
Configure the world and player experience
World and access
| Control | Default and choices | What it changes |
|---|---|---|
| World Size | Medium; Small, Medium, Large | Size of a new world. It does not resize an existing save. |
| World Difficulty | Classic; Classic, Expert, Master, Journey | Difficulty selected when generating a new world. It does not rebuild an existing world. |
| MOTD | A welcome message | Message shown to joining players. |
| Steam Lobby Mode | Public; Public, Friends Only, Private | Steam lobby visibility. Use the joining password to restrict access; visibility is not a password. |
| Secure Server | Off | Enables the game's additional security checks. |
| Enable Whitelist | Off | Restricts access to allowed players. The Console has no whitelist editor; leave this off unless an allowed-player list has already been prepared. |
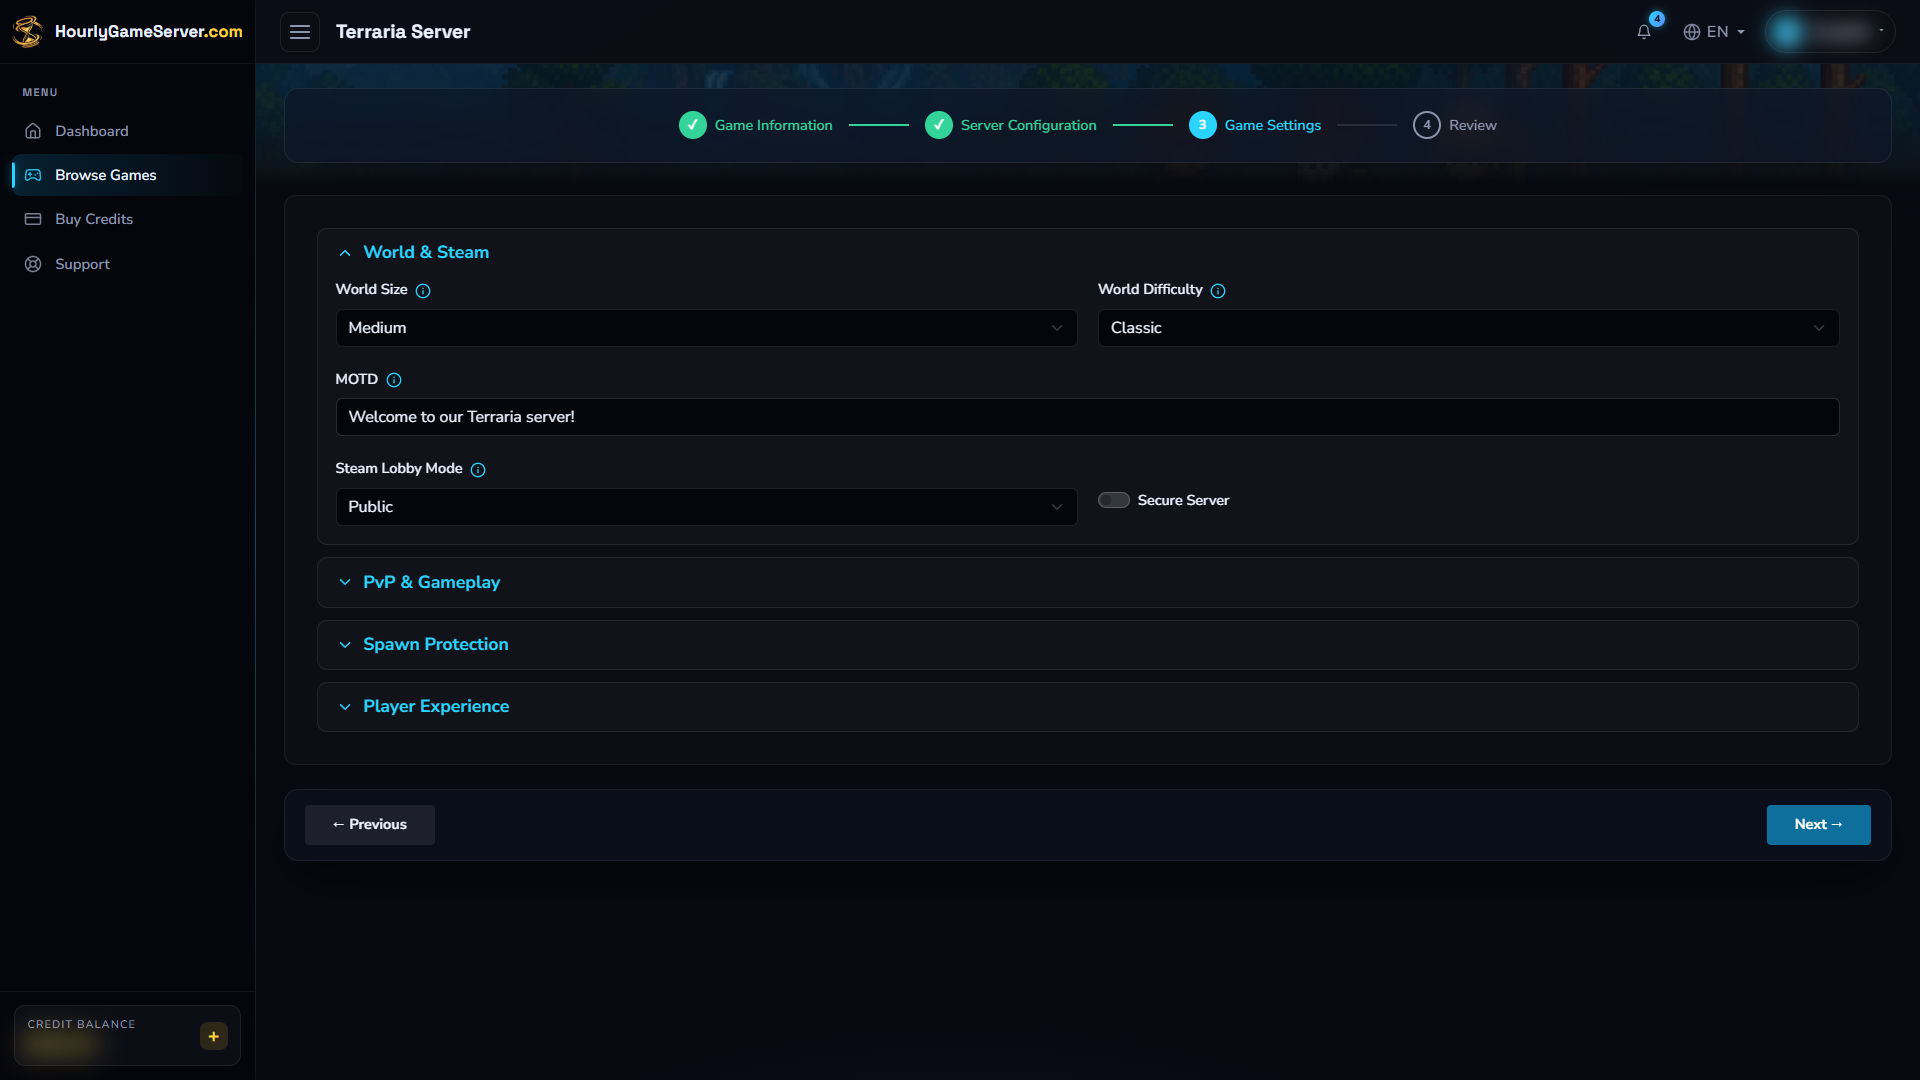
World & Steam contains the initial world choices. Select World Size and World Difficulty before the first world is generated; these are separate from the hosting-resource size.
The game's Max Players slider is not part of this settings form. Do not confuse world size or Steam lobby visibility with a player-capacity control.
Gameplay and protection
PvP Mode defaults to Normal. Choose Disabled to turn PvP off, Always On to force it on, or No Team Spawn for that alternative PvP rule.
The following restrictions default to off: Disable Building, Disable Hardmode Trigger, Disable Dungeon Guardian, Disable Clown Bombs, Disable Tombstones, and Region-Protect Chests. Change only restrictions you want for your community. Preventing the Hardmode trigger does not reverse a world that is already in Hardmode. Region-based chest protection is not an editor for creating protected regions.
Enable Spawn Protection is on by default. Spawn Protection Radius starts at 10 tiles and can be set from 5–50. If players cannot build near spawn, check this protection before assuming the server is broken.
Player experience and saving
- Remember Player Positions defaults to off; enable it to remember where players left.
- Max Login Attempts is 3, with a range of 1–10, for TShock account login attempts. This is not the maximum number of connected players.
- Periodic Auto-save defaults to on. Keep it enabled for regular in-session world saves. It does not provide a downloadable backup or restore button in the Console.
Stop, save, and start
- Warn players before disconnecting them.
- Select Stop and wait for Stopped.
- Open Game Settings, make your changes, and select Save Settings.
- Select Start, wait for Running, and reconnect to check the result.
You cannot save game settings while the server is running, starting, or stopping. Changes to World Size or World Difficulty do not replace an existing save. Plan these before creating your world rather than repeatedly restarting to try to regenerate it.
A normal stop preserves the world and pauses hourly billing once shutdown finishes. Starting again restores that data. Do not delete the server to pause it: deletion permanently removes its saves.
Join from Terraria
- Wait for Running, then copy the current IP Address or Domain Name from the Console.
- Open Terraria and select Multiplayer > Join via IP.
- Choose a compatible character.
- Enter the copied address without a web prefix such as
https://. - Enter 7777 when asked for the port.
- Provide the server joining password if prompted.
This connection uses TCP 7777. You do not need to run Host & Play or configure a server on your own computer. Terraria's official server setup guide explains the IP-join workflow and default port. Share the current address and password privately.
Administration, players, and mods
While Running, Player Management shows the online roster and supports Kick, Ban, Unban, and Broadcast Message. Check the correct player before taking action. Kick disconnects a session; Ban prevents return until unbanned. Broadcast is useful for announcing that the server will stop.
There is no Make Admin action for Terraria. TShock administration uses its own accounts and groups; a hosting share role is not an in-game administrator account. The Console does not provide an account/group or protected-region editor.
There is no Mods section for Terraria. Installing tModLoader packs or uploading TShock plugins is not offered here; use the supported game-settings controls instead.
Troubleshooting
| Symptom | What to check |
|---|---|
| Connecting never completes | Confirm Running, copy the latest address, use port 7777, and check your client version. |
| Character cannot enter | Journey worlds require Journey characters; use a non-Journey character for other difficulties. |
| Access denied | Check the joining password and whether Enable Whitelist was turned on without an allowed-player list. |
| Building is blocked | Review Disable Building and spawn protection. Region permissions may also apply. |
| World size or difficulty did not change | These are generation settings, not a conversion of the current save. |
| Player controls are missing or disabled | Wait for Running and the first roster update; confirm your shared role's permissions. |
| Persistent error or lag | Check CPU, Memory, the status message, and Activity Log. Give support the server name and time of the problem, without credentials. |